


The next effect we used was the speed and duration tool. The reason we used this was because there were moments throughout our live performance were the lighting was really nice and we wanted to have more focus on the lights. Because we wanted to make the lights last longer we slowed them down so that they lasted long enough. But we made sure the slow mo wasn't noticeable.

The main visible effect in our video was the mirror effect towards the end of the video. There were many layers to achieving this effect. The first was layering two identical videos on top of each other.

Once we had done this we horizontally flipped one of the layers. This meant when we went to crop them later it would create the mirror effect.
Finally we had to crop both layers by 50%. This would mean that the videos would be cut perfectly in half. Because the horizontal flip when the videos are put together it created the mirror effect.
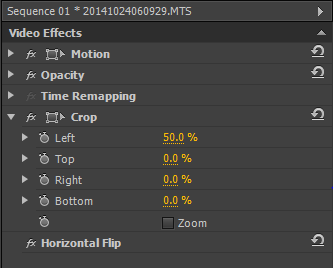
The above picture shows exactly what effects were added to the layers. The image below shows the effect it created. Because the clips are identical they play at the exact same time thus creating the mirror effect.

Finally to touch shots up at the end of the final edit we used a tool called three way color corrector as you can see displayed below. This allowed us to slightly enhance some of the colors in the video. We specifically focused on the red in the live performance as it would make my shirt stand out among the lights. This makes the final edit more chrisp which is why we wanted to add it at the end. Without this some shots would look bland and boring and that is not what we wanted.]
